

Description
Friends, let me tell you about something that completely changed my photography editing this year. Main had been struggling with color consistency across my photo sets for a long time. Every shoot looked different. Some photos came out warm, some cold, some flat. I spent hours manually tweaking each image, trying to get that rich,h vibrant look that catches your eye on social media. Then, en in early 2,026 I decided to color-enhance presets on a batch of 100 photographs from five completely different shoots. Portraits, street photography, food shots, landscapes, and indoor event coverage. My goal was simple. Apply these presets and see if they actually deliver what they promise. The transformation of certain images literally made me stop scrolling and zoom in because I could not believe it was the same photograph.
What Exactly Are Color Enhance Presets and Why They Matter
A color-enhance preset is a pre-built adjustment file for Lightroom that specifically targets color vibrancy, saturation balance, tone mapping, and luminance across your photograph. Unlike generic filters that just slap a color cast over everything, these presets work intelligently with the existing colors in your image. They boost what needs boosting and pull back what needs restraint.
The reason these matters more in 2026 than ever before is that social media algorithms genuinely favor visually striking content. Muted, flat images get scrolled past. Rich, well-balanced color work stops the thumb. These presets give you that professional color grade without spending twenty minutes per image.
My Testing Method and Why I Chose 100 Photos
I did not just randomly pick photos. I deliberately selected 20 images from each of five categories to give the presets a fair and thorough evaluation.
- 20 outdoor portraits shot in natural golden hour light
- 20 street photography frames from busy Indian markets
- 20 food photographs taken under restaurant tungsten lighting
- 20 landscape shots from a Western Ghats weekend trip
- 20 indoor event photos from a birthday party with mixed lighting
Every photo was shot in RAW format on my Sony A6400. I applied the same set of color-enhance presets to all 100 images without any manual adjustment first. I wanted to see the pure, unmodified preset result before deciding whether further tweaking was needed.
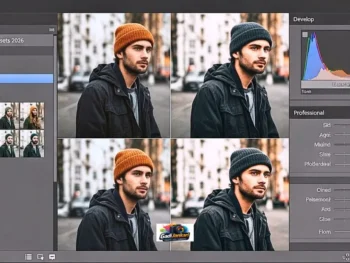
The Portrait Results Were the First Surprise
My outdoor portraits had decent color to begin with,h but they looked a bit washed out in the shadows. After applying the product, et the skin tones gained a natural warmth without going orange. The background greens became deeper and more saturated. Eye highlights got a subtle pop that made the subjects look more alive.
What impressed me most was that color-enhancement presets did not push skin into unnatural territory. Brown skin tones specifically looked accurate and flattering. This has been my biggest complaint with most preset packs, and these handled it remarkably well.
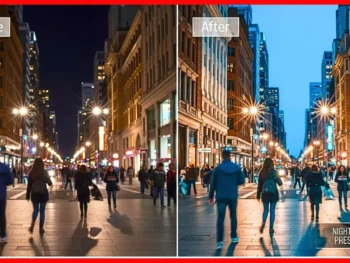
Street Photography Got an Entirely New Energy
Indian street markets are chaotic with color. Marigold garlands, painted walls, colorful fabrics, everything fights for attention. My original RAW files looked accurate but visually flat. The preset brought selective vibrancy to warm tones while keeping blues and shadows controlled.
The banana vendor cart shot was my standout. The yellows became rich and warm without bleeding into the wooden cart behind. The blue tarpaulin in the background stayed muted instead of competing. That selective intelligence in color handling is what separates good color-enhancee presets from basic saturation sliders.
Food Photography Needed the Most Help
Restaurant lighting is my weakness. Tungsten bulbs create orange casts that make food look unappetizing. I expected the presets to struggle here, but they actually performed surprisingly well. The white balance correction built into the preset neutralized the worst of the orange cast.
My plate of biryani went from looking like it was photographed through an amber filter to looking like a professional food magazine shot. The rice grains became distinct, the garnish cilantro looked green instead of brown, and the raita in the side bowl looked cool and fresh. This single category alone justified my purchase of the color-enhanced presets pack.
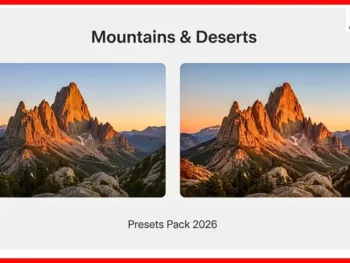
Landscapes Showed the Most Dramatic Transformation
The Western Ghats photos were already beautiful compositions, but the colors were flat due to haze and overcast skies. After the preset application,n the green canopy gained depth with visible variation between different tree species. The sky went from white and grey to a subtle blue with cloud texture becoming visible.
One specific waterfall shot went from being a decent travel snap to something I genuinely considered getting printed for my wall. The water retained its natural white, and the surrounding rock gained texture through improved contrast in the midtones. Color-enhance presets work hardest on landscape files because there is so much color data to work with.
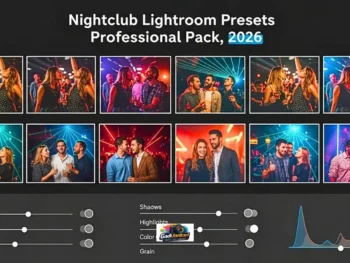
Indoor Events Were the Toughest Test
Birthday party photos with mixed lighting from tube lights, fairy lights, and phone flashlights are editing nightmares. The preset helped significantly, but this category needed the most manual correction afterwards. About 12 out of 20 images looked good with just the preset. The remaining 8 needed white balance fine-tuning.
The cake-cutting shots looked noticeably better, though. The red and blue fondant colors popped without looking neon. Skin tones under the fairy lights maintained warmth without excess yellow. For mixed lighting situations, the color-enhance presets give you about 70 percent of the way there, which still saves enormous editing time.
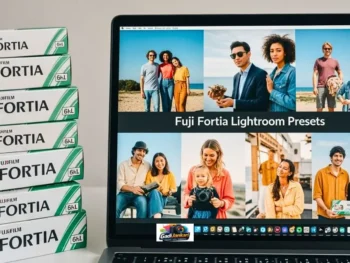
What Comes Inside This Preset Pack
The complete pack is well organized and comprehensive. You get multiple preset variations within the color enhancement category,y so you are not stuck with a single look. The included tutorial content helps beginners understand how to get the best results even if they have never used Lightroom presets before.
Everything works on both the h desktop Lightroom Classic and the Lightroom CC mobile app. The .xmp and .dng file formats ensure universal compatibility across devices. Installation is straightforward with the included PDF guide walking through each step with screenshots.
Honest Pricing and My Value Assessment
The complete color-enhance presets pack costs approximately Rs 1,800 to Rs 3,500, depending on the seller and bundle options available. Some stores offer a starter set with fewer presets for around Rs 900 to Rs 1,200. Considering I was spending roughly 15 to 20 minutes per photo on manual color work, these presets save me approximately 8 to 10 hours per month.
At any reasonable valuation of my editing time, the pack paid for itself within the first week of use. Compared to individual preset purchases that I made previously,y totaling over Rs 12,000 across three years, this single cohesive pack delivers better results at a fraction of the cost.
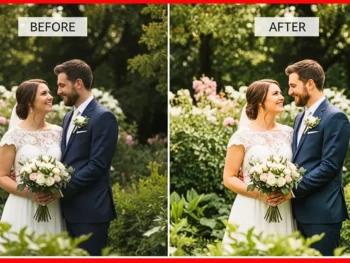
Who Gets the Maximum Benefit
Wedding photographers processing hundreds of images per event will see immediate time savings. Portrait photographers wanting consistent skin tone handling across diverse complexions need these presets. Food bloggers and restaurant photographers struggling with indoor lighting will find the color correction invaluable. Travel content creators posting across social platforms need the visual consistency these provide. Product photographers wanting true-to-life color accuracy for e-commerce listings will appreciate the balanced approach.
Product Status
- Released 2025
- Last Update May 2026 with additional preset variations for indoor mixed lighting and improved performance on mobile Lightroom.
Frequently Asked Questions
Do these presets work on JPEG files or only on RAW
They work on both formats. RAW files give better results dramatically because there is more color data for the preset to work with. JPEG files still show noticeable improvement, but with less flexibility for further manual adjustment.
Can I adjust the preset strength after applying it
Yes. After applying any preset,t you can modify individual sliders in the Develop module to increase or decrease specific adjustments. I typically bring the overall effect down to 80 percent for the most natural-looking result.
Will these presets fix badly underexposed or overexposed photos
No preset can fix severe exposure problems. These are designed to enhance color on properly exposed or slightly underexposed images. Always correct your basic exposure before applying any color preset for the best outcome.
Are commercial usage rights included?
Yes. The standard license allows unlimited personal and commercial use. You can apply these presets to client deliverables, printed work, and social media content without additional fees or attribution requirements.
How often does the creator update the preset pack?
There are no more suggestions. Updates have been released approximately every four to six months since the original launch. All updates are included free with your purchase through lifetime access, so any new presets added in the future come at no extra cost.