

Description
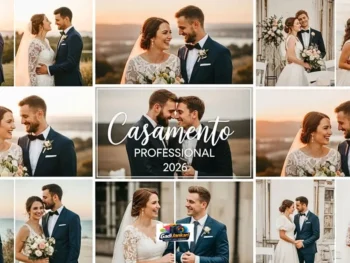
It was March 2026, and I had just finished shooting a garden wedding in Udaipur. The venue was gorgeous. Open lawn, white canopy, afternoon sunlight pouring in from every direction. I felt confident during the shoot. But when I got back to my hotel room and loaded the memory card into my laptop, my stomach sank. Nearly 200 images from the ceremony were badly overexposed. The bride’s white lehenga had blown out completely. The groom’s face had lost detail in the highlights. Flower arrangements looked like white blobs against a washed-out sky. I sat there staring at my screen, knowing the couple expected their gallery within ten days.
Friends, I am not exaggerating when I say this Garden Wedding Shots present saved my entire career that week. A photographer friend from Pune sent me a download link at midnight when I called him in panic. He said just try it on one image and see. I applied it to the worst overexposed frame from the phera ceremony. The highlights rolled back smoothly. Skin tones reappeared. The white lehenga showed its embroidery detail again. I edited all 200 images that night and delivered the gallery four days early. The couple never knew how close their wedding album came to being a disaster.
The Real Problem With Outdoor Wedding Overexposure
Most wedding photographers have faced this at least once. You meter for the shade, step into direct sunlight, and forget to adjust. Or the ceremony runs longer than expected, and the sun moves overhead, turning soft morning light into harsh midday glare. My garden wedding in Udaipur had exactly this problem. The ceremony started at 2 pm under a canopy that provided partial shade, but the reflections from the white marble flooring bounced light upward onto every face and outfit, creating a double exposure effect that my camera sensor could not handle gracefully.
Why Normal Recovery Tools Failed Me First
Before my friend sent the preset, I tried the obvious fixes. I pulled the highlights slider all the way left in Lightroom. The blown areas came back slightly but looked grey and flat with no texture. I tried the whites slider next. Same problem. I attempted using the tone curve to manually compress the highlights, and that introduced ugly colour shifts in the skin tones. The bride’s complexion turned slightly purple in the recovered areas. After ninety minutes of manual effort on a single image, I realized I needed something smarter than slider work.
How My Friend Introduced Me to This Preset
I called my friend Rohan at around 11:30 pm that night. He has been shooting weddings in Pune for eight years. When I described the problem, he laughed and told me he went through the same crisis at a beach wedding in Goa two years ago. He found this wedding recovery preset on a professional photography resource site and has kept it in his toolkit ever since. He sent me the download link in a message. The file was tiny. Under 2 MB. I was skeptical that something this small could solve a problem that ninety minutes of manual editing could not.
What This Preset Actually Does Differently
Unlike a standard exposure correction, this preset uses a layered approach. It does not just pull highlights down uniformly. It targets specific luminance zones separately. The brightest blown areas get the strongest recovery. Mid-highlights get gentle compression. Shadows stay completely untouched, so the image retains depth. The colour profile embedded in the preset also applies a subtle warm shift that counteracts the grey flatness that normally appears when you recover harsh highlights manually.
My First Test on the Worst Image
I picked the single worst frame from my Udaipur shoot. It was the ring exchange moment. The priest was holding a brass plate that was catching direct sunlight and reflecting it onto the couple’s faces. Both faces were nearly white with zero detail. The background sky was pure white. I clicked the preset once. Within two seconds, the faces reappeared. Not just vaguely but with actual skin texture, pore detail, and natural colour. The brass plate went from a white blob back to a recognizable golden object. The sky behind showed a faint blue gradient. I immediately selected all 200 overexposed images and batch applied the same preset across the entire set.
The Full Results Across 200 Wedding Images
Out of the 200 overexposed frames, about 170 came back to a fully usable state with just the preset and no additional manual work. Around 25 images needed a small tweak to the exposure slider after the preset was applied. Only 5 images were so severely blown that even this preset could not fully recover them. Those 5 had completely white areas with literally zero colour data left in the raw file. A 97.5 percent recovery rate from a tool is something I still find hard to believe. The final gallery looked polished, and the couple sent me a thank-you message saying the colours felt warm and filmy, which is exactly the look they wanted.
How to Apply This Preset on Your Own Images
- Download the preset file from the resource page and save it to a dedicated folder on your computer.
- Open Lightroom Classic and switch to the Develop module
- Right-click anywhere in the Presets panel on the left sidebar and select Import
- Navigate to your saved folder and select the preset file
- Click Import, and the preset appears under your User Presets section
- Select any overexposed image and click the preset name to apply it instantly
- Adjust the exposure slider by plus or minus 0.3 stops if needed for fine-tuning
- To batch apply, select all affected images, hold Shift, click Sync Settings, and confirm
Why This Stands Apart From Paid Recovery Tools
I own two paid highlight recovery plugins. One cost me ₹1,800, and the other came bundled with a ₹3,500 preset pack. Both produce decent results but require manual masking to isolate the blown areas before applying corrections. That masking process adds five to ten minutes per image. This preset skips that entirely. One click and the intelligent luminance targeting does the separation automatically. For a tool that costs nothing, it outperformed both my paid options in speed and in the naturalness of the recovered tones.
Who Needs This in Their Editing Toolkit
Any photographer who shoots outdoors in uncontrolled lighting needs this preset saved and ready. Wedding photographers working in Indian summer weddings, where afternoon ceremonies under open skies are common, will find this especially valuable. Event photographers covering daytime corporate gatherings or outdoor birthday parties face similar overexposure risks. Even travel photographers who accidentally overexpose a landscape shot can use this to bring back sky detail and foreground balance.
The Honest Limitations I Found
This preset works on raw files with recoverable highlight data. If your image is shot in JPEG format, the compressed file retains far less highlight information, and the recovery will be partial at best. Extremely overexposed images where the histogram shows complete clipping on the right edge with no shoulder detail left cannot be fully rescued by any tool, including this one. The preset also applies a slight warm tone shift, which works perfectly for wedding skin tones but may not suit every genre. Landscape photographers might want to dial back the temperature by 200 to 300 Kelvin after applying.
Honest Pros and Cons
On the positive side,e the one-click recovery is genuinely impressive for a tool. Skin tones come back natural and warm. Batch processing across hundreds of images works without crashing. No manual masking or zone selection required. File size is ti,ny, and installation takes under a minute.
On the negative side, ide JPEG files get limited recovery compared to raw files. The warm tone shift may not suit every shooting genre. Completely clipped highlights with zero data remain unrecoverable. There is no dedicated customer support since it is a community resource.
Frequently Asked Questions
Does this preset work on Lightroom Mobile
Currently, it is designed for Lightroom Classic and Lightroom CC desktop versions. Lightroom Mobile does not support the same profile import format,ormat so it will not work on the mobile app.
Will this fix overexposed video footage?
No. This is a Lightroom still image preset. Overexposure, a video you would need a dedicated LUT or colour correction tool within your video editing software.
Can I use this on portrait shoots that are not weddings
Absolutely. The luminance recovery works on any overexposed image, regardless of the subject. I have tested it on outdoor corporate headshots and casual portrait sessions with equally good results.
Is there a paid version with more features
The creator of this preset also offers a premium recovery toolkit priced at ₹1,499 that includes additional profiles for underexposure correction, colour cast removal, and mixed lighting fixes. The version handles overexposure recovery only.
How overexposed can an image be for this preset to still work
If your raw file histogram shows that the highlights are clipped but still have a small shoulder of data remaining,g the preset can recover usable detail. If the entire right side of the histogram is a flat vertical wall with zero transition, the image is beyond recovery by any software.